- ・How to install the theme
* Please read the notes in the Readme.txt included in the theme ZIP file.
(Github) https://github.com/Q-ta-s/SF2000-Custom-Themes/releasestag/latest
(SF2000 Theme Collection) https://zerter555.github.io/sf2000-collection
« Back
-
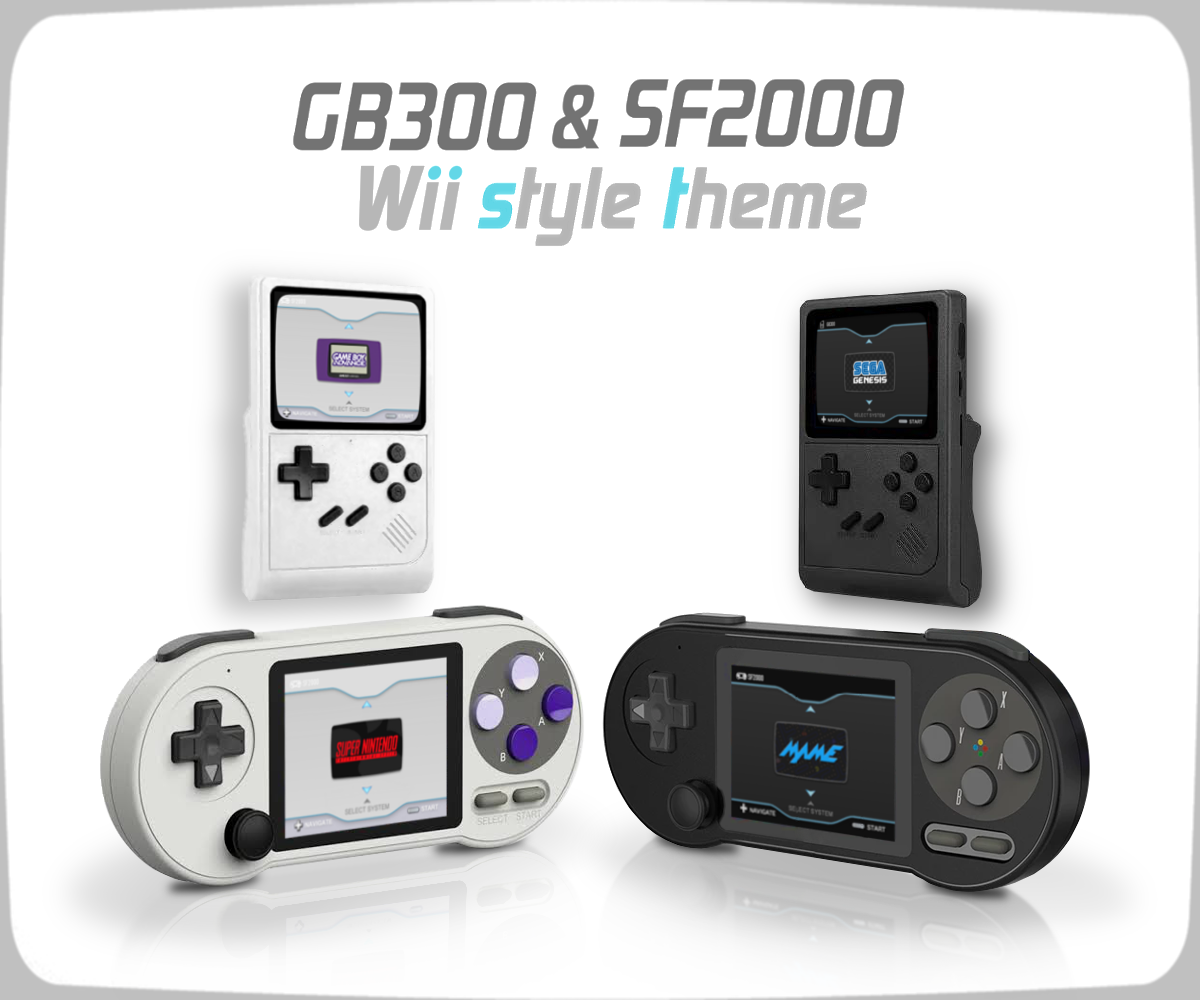
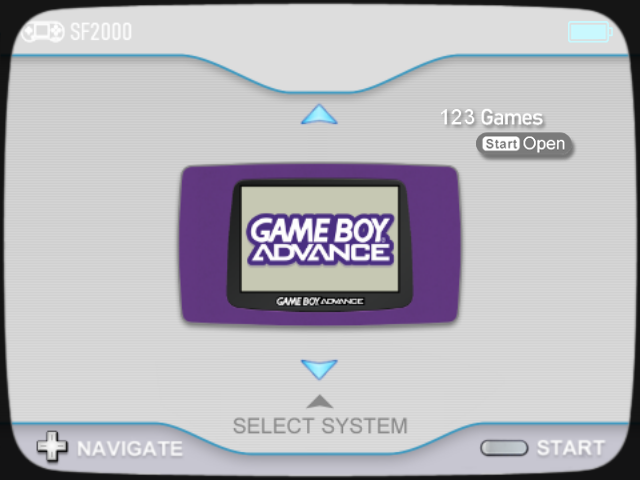
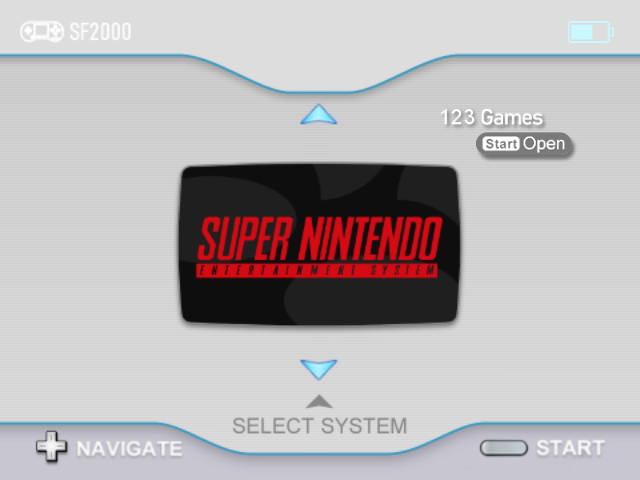
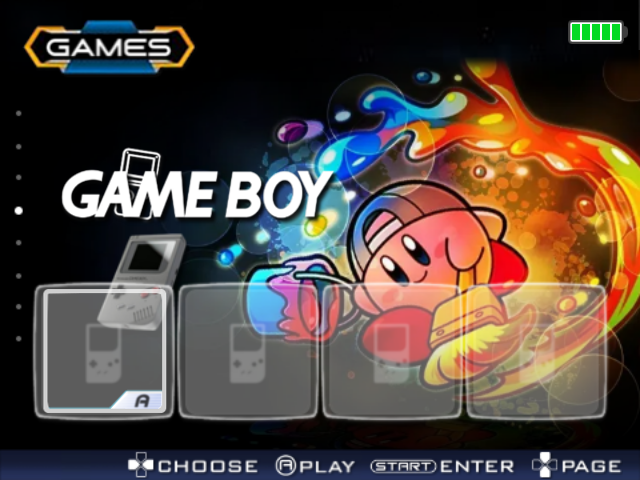
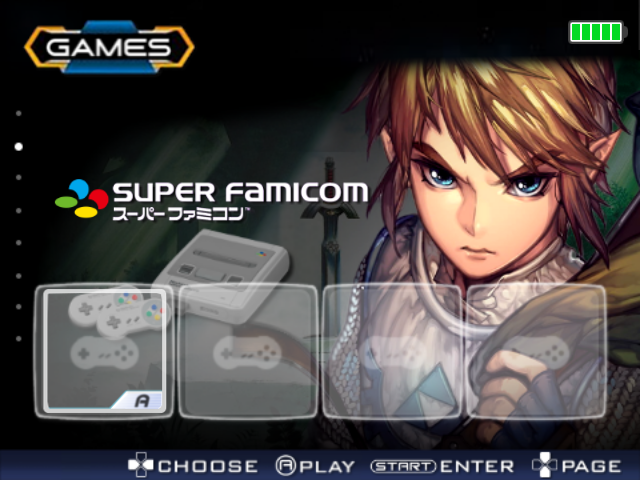
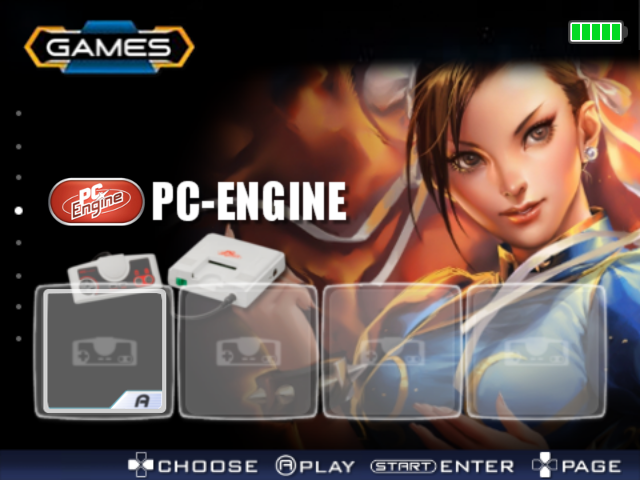
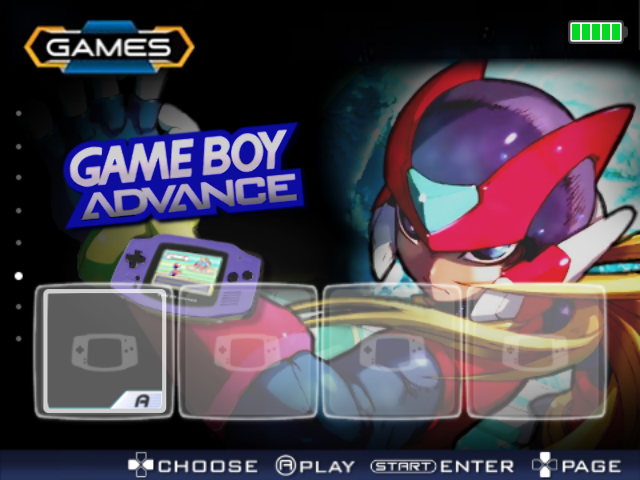
1. Wii menu like style theme
This theme is alpha version. (Standard and Japanese theme) * Listening to some people opinions, removed 4 game shortcuts for this theme. Recommend that backup the "Resources" folder on SD card before applying theme. This theme is customized (for mulitcore) game system order and categories, so may not be able to use it properly (e.g. game not starting) unless read Readme.txt.
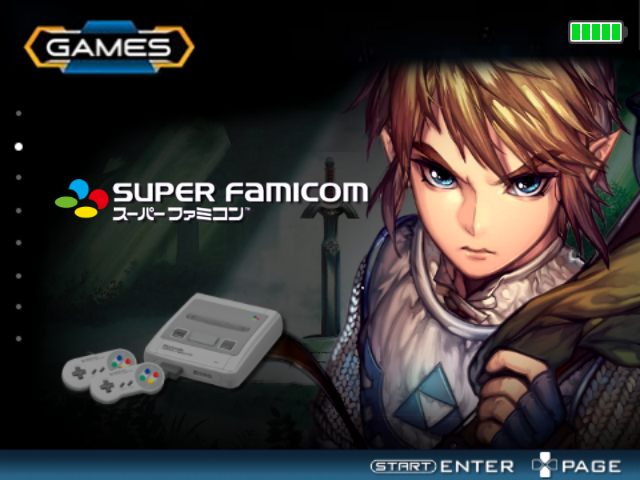
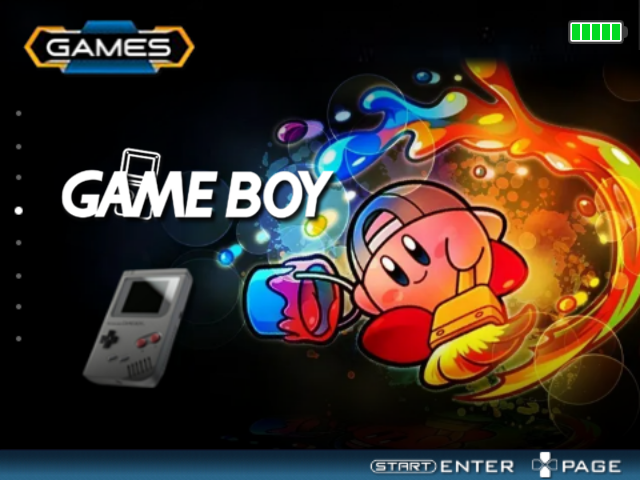
Game System Menu: FC, SFC, GBA/GB/COLOR, PCE, MD/GG/SMS, ATARI/LYNX/NGP, ARCADE, USER R&S
* If having trouble using the theme, also able to try ST version. -
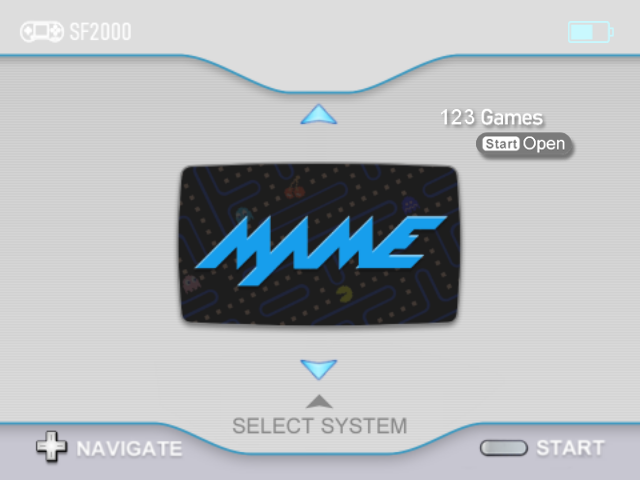
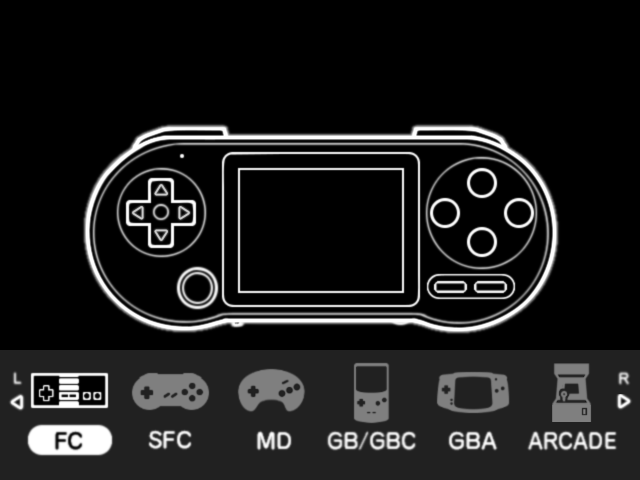
2. Wii menu like style theme
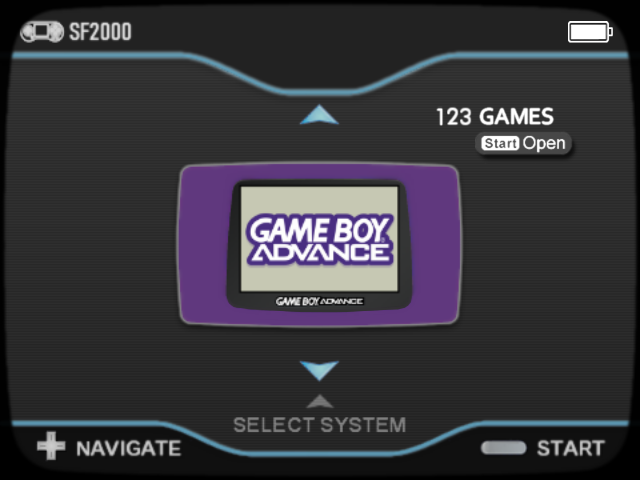
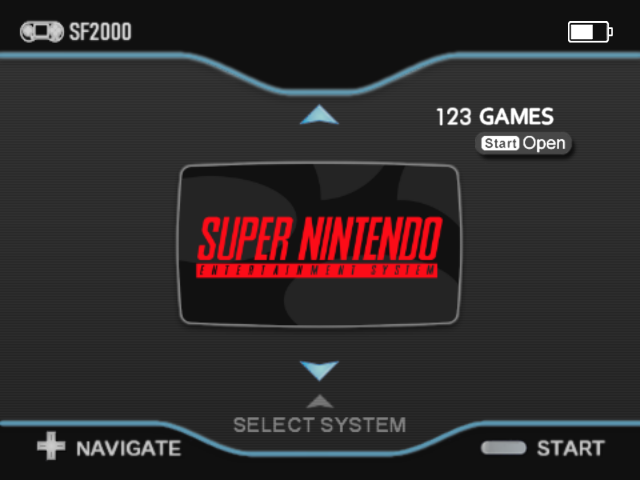
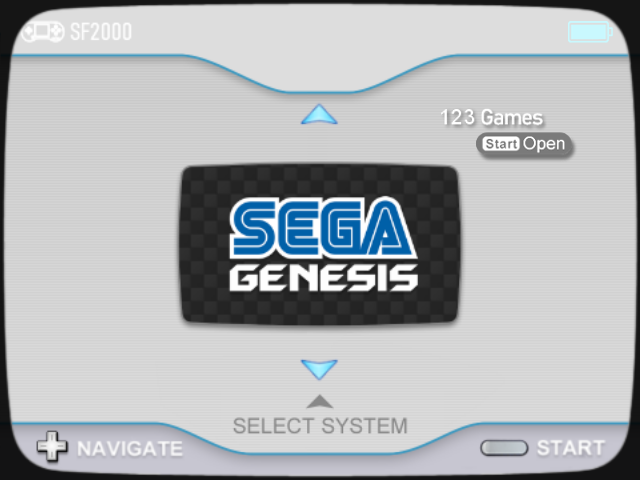
For those of who find the Wii-style CRT look too nostalgic (or a bit old-fashioned), also shared the theme version without TV-overlay. Game System Menu: FC, SFC, GBA/GB/COLOR, PCE, MD/GG/SMS, ATARI/LYNX/NGP, ARCADE, USER R&S(without CRT TV-overlay)
* If having trouble using the theme, also able to try ST version. -
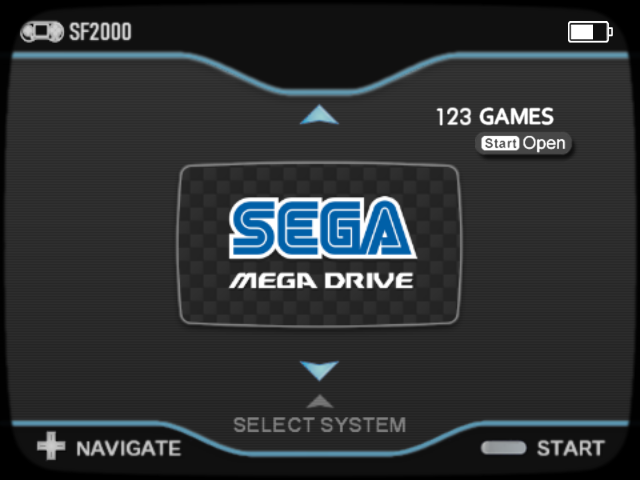
3. Wii menu like style Dark theme
Sharing the two versions👾. (Standard and Japanese theme) * Listening to some people opinions, removed 4 game shortcuts for this theme. Recommend that backup the "Resources" folder on SD card before applying theme. This theme is customized (for mulitcore) game system order and categories, so may not be able to use it properly (e.g. game not starting) unless read Readme.txt.
Game System Menu: FC, SFC, GBA/GB/COLOR, PCE, MD/GG/SMS, ATARI/LYNX/NGP, ARCADE, USER R&S
* If having trouble using the theme, also able to try ST version. -
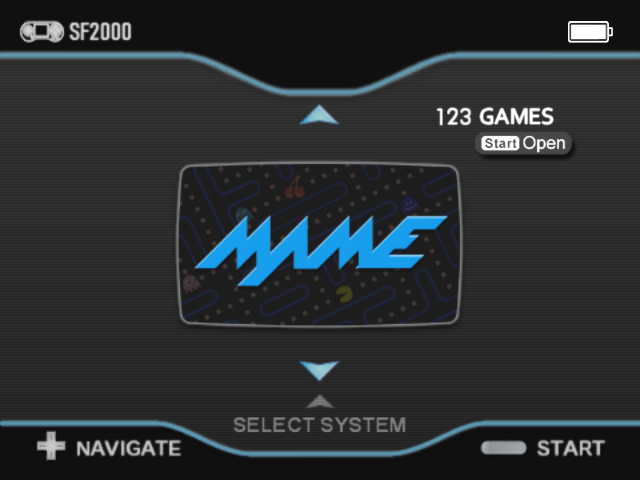
4. Wii menu like style Dark theme
For those of who find the Wii-style CRT look too nostalgic (or a bit old-fashioned), also shared the theme version without TV-overlay👾. Game System Menu: FC, SFC, GBA/GB/COLOR, PCE, MD/GG/SMS, ATARI/LYNX/NGP, ARCADE, USER R&S(without CRT TV-overlay)
* If having trouble using the theme, also able to try ST version. -
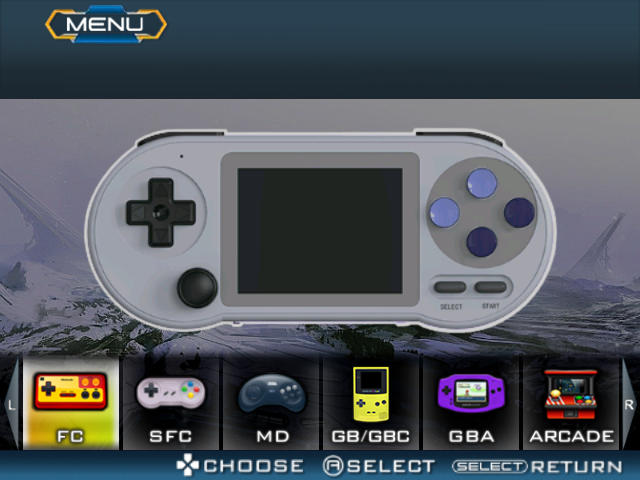
5. Wii menu like style theme - ST
This theme is Standard menu specifications.
FC, SFC, MD, GB, GBC, GBA, ARCADE, USER R&S
This version should solve most of the problems with games not working on Wii style🤖. * For intermediate users who like to customize the main menu, such as categorizing it for multicore (include PCE, GG/SMS, ATARI, NGPC etc), Regular version is recommended rather than this ST version. -
6. Wii menu like style theme
This theme is Standard menu specifications.(without CRT TV-overlay) - ST
FC, SFC, MD, GB, GBC, GBA, ARCADE, USER R&S
* For intermediate users who like to customize the main menu, such as categorizing it for multicore (include PCE, GG/SMS, ATARI, NGPC etc), Regular version is recommended rather than this ST version. -
7. Wii menu like style Dark theme - ST
This theme is Standard menu specifications.
FC, SFC, MD, GB, GBC, GBA, ARCADE, USER R&S
This version should solve most of the problems with games not working on Wii style👾. * For intermediate users who like to customize the main menu, such as categorizing it for multicore (include PCE, GG/SMS, ATARI, NGPC etc), Regular version is recommended rather than this ST version. -
8. Wii menu like style Dark theme
This theme is Standard menu specifications👾.(without CRT TV-overlay) - ST
FC, SFC, MD, GB, GBC, GBA, ARCADE, USER R&S
* For intermediate users who like to customize the main menu, such as categorizing it for multicore (include PCE, GG/SMS, ATARI, NGPC etc), Regular version is recommended rather than this ST version. - This is a plugin that changes the game selection list menu to a new interface
- Coming soon

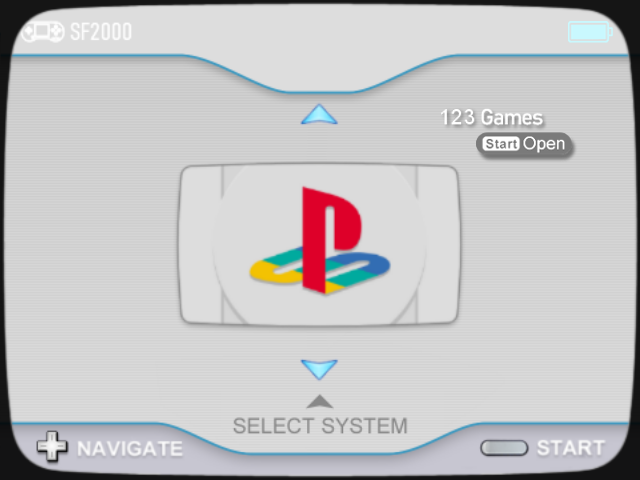
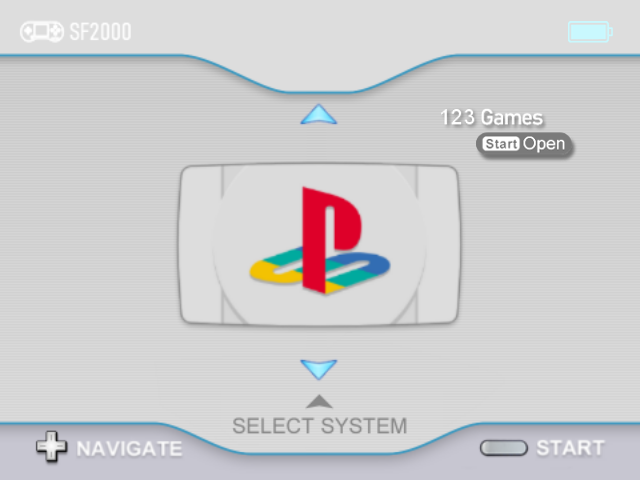
・ Wii menu like style theme - PS1 Edition
A custom theme for the PS1 game menu. (Multimedia menu are also available.)
This is a custom theme with "PS1" and "Multimedia" menus that are not included in the regular version. (Standard / without CRT TV-overlay / Japanese theme)
・Game system menu:
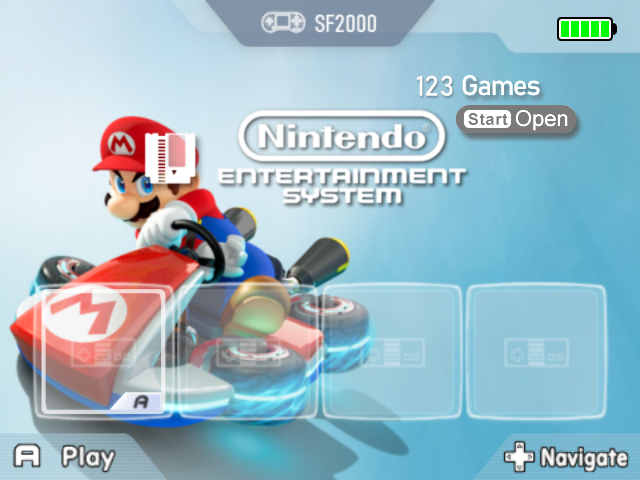
1. NES (FC)
2. SNES (SFC)
3. GB/GBC/GBA
4. PCE
5. MD/GG/SMS
6. PS1
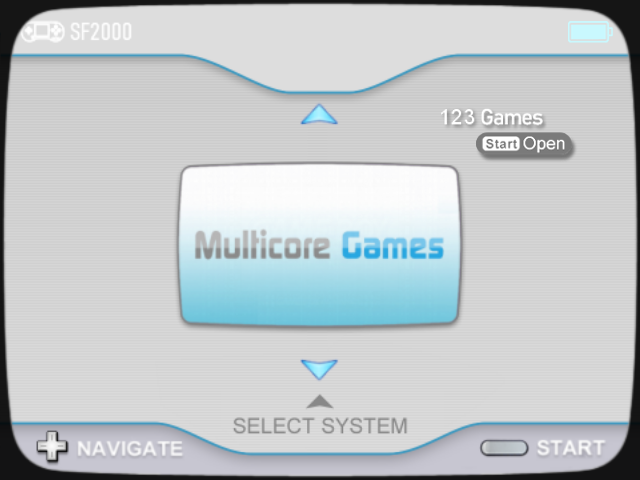
7. MULTI MEDIA
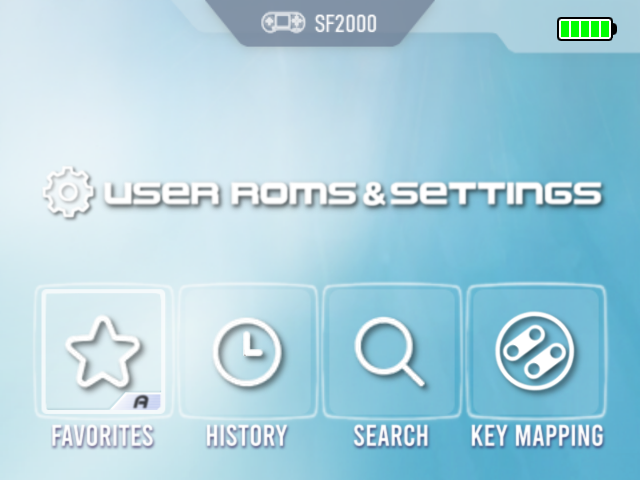
8. USER ROMS & SETTINGS
*This theme does not include the "ARCADE" menu due to the addition of the "PS1" and "MULTI MEDIA" menus.
If you require the "ARCADE" menu, please use "TYPE A".
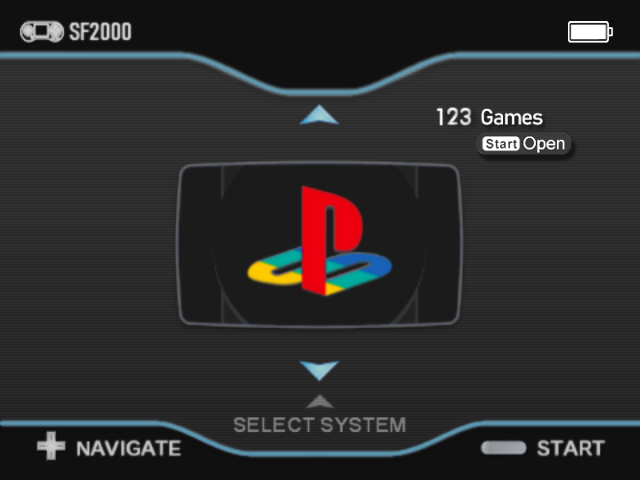
・ Wii menu like style Dark theme - PS1 Edition
This is a custom theme with "PS1" and "Multimedia" menus that are not included in the regular version👾. (Standard / without CRT TV-overlay / Japanese theme)・Game system menu:
1. NES (FC)
2. SNES (SFC)
3. GB/GBC/GBA
4. PCE
5. MD/GG/SMS
6. PS1
7. MULTI MEDIA
8. USER ROMS & SETTINGS
*This theme does not include the "ARCADE" menu due to the addition of the "PS1" and "MULTI MEDIA" menus.
If you require the "ARCADE" menu, please use "TYPE A".

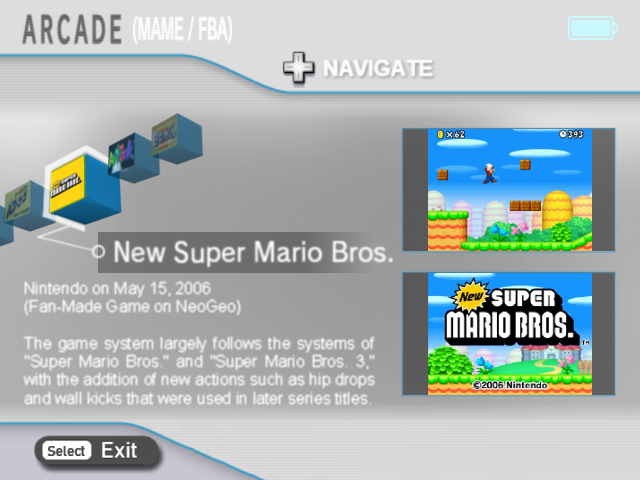
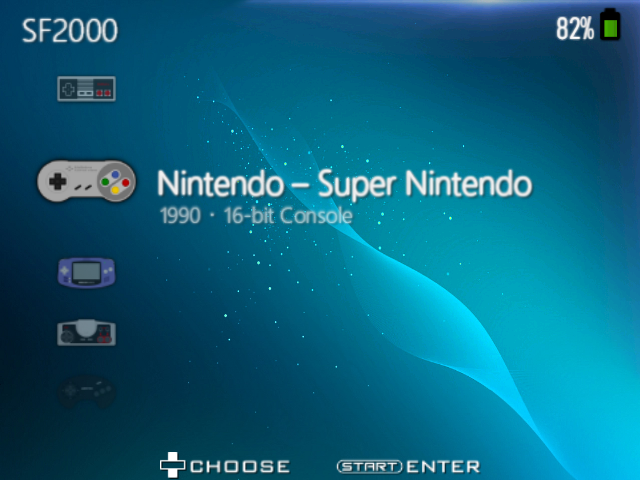
・ Wii menu like style theme - 13 menus version
(* Please download the multicore "13 menus extended" build and overwrite to the "bios" folder.)
* This custom theme is for "13 menus extended" (nightly build).
2025.01.12: The loading screen of multicore game is none, but the build below has changed it to black loading screen and is also the new build version, so also recommend it.
https://discord.com/channels/741895796315914271/1346239799924883567/1346831681360760862(Thank you @Desoxyn )
Thanks to @Geonux for releasing the new BIOS build for testing👾
(multicore credit) Developers: @osaka, @Prosty, @Kobil, @Michael Adcock. multicore license: https://github.com/madcock/sf2000_multicore_cores?tab=GPL-3.0-1-ov-file
・The menu is set as follows:
1. NES (FC)
2. SNES (SFC)
3. GB
4. GBC
5. GBA
6. PCE
7. SEGA (MD/GG/SMS)
8. ATARI/LYNX/NGPC
9. WONDER SWAN
10. PS1
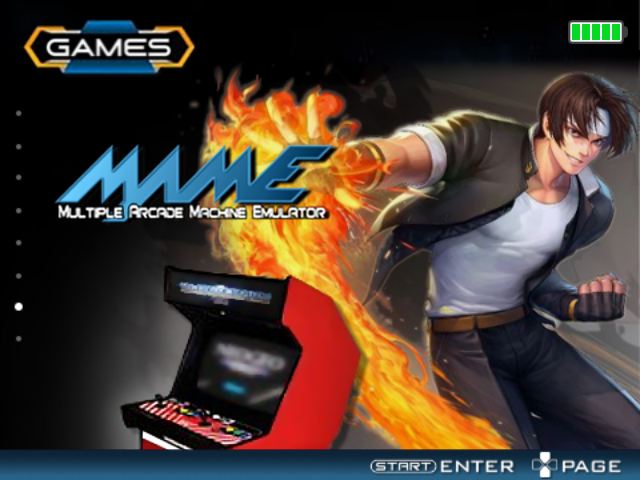
11. ARCADE (MAME/FBA)
12. MULTICORE
13. USER ROMS & SETTINGS
* BIOS spec itself include SNES-fix. Also supports multicore nightly in-game save ver. cores. (added FoldernamX.ini)
Please make sure to backup your "bios" and "Resources" folder before applying the theme.
[Installation instruction] * Prepare SD card that has multicore installed and can play games normally.
1. After backup the bios & Resources folder on the SD card, download and unzip the 13 menus extended build file and overwrite it on the SD card. (* You can also overwrite only "/bios/bisrv.asd")
2. Download and unzip below custom theme and overwrite it on the SD card.
3. After installation, run the "/Resources/Qs_tool" (batch file) included with the theme to rebuild the game list with PC. (rebuild recommend to specify "all". For details, please see Readme.txt included with theme's zip file)
The installation is now complete. Boot SF2000 and check 13 menus.
[Note:] * If you already have rearranged the game list yourself using the V2 tool, the order will be reset if you rebuild the game list with Qs_tool. (Because the custom reordering function is only supported by the V2 tool)
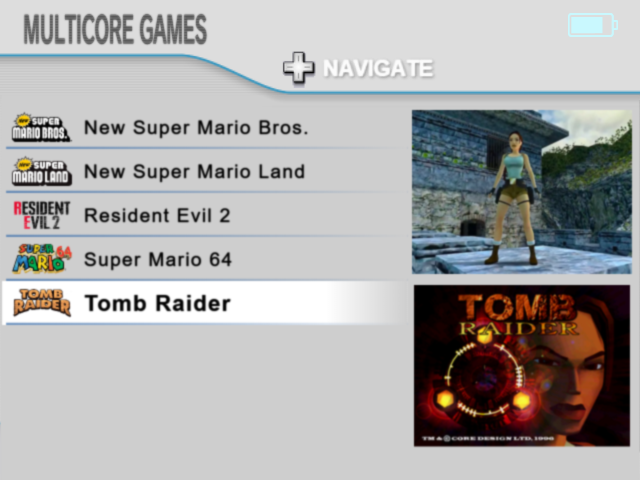
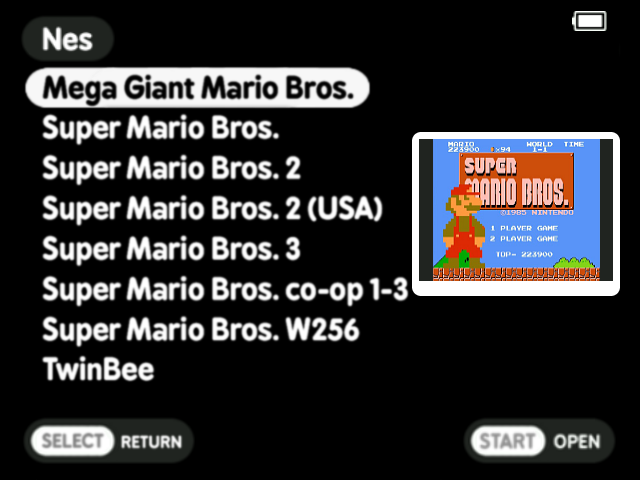
・ (plugin) Wii style theme - Hyper List Game Menu
This is a plugin that changes the game selection list menu to a new interface. (* currently a testing release.)
* Installation Guide is explained in "detail ▼"
This HyperScreen is a plugin adjusted for the Wii menu style theme.* HyperScreen is a feature invented by @Sparda_Hunter
-----
[Necessary tools] 1. Hyper Screen Generator (for Hyper List) --> hyper_list_gen.html
2. HyperScreen Enabler --> /Resources/Qs_tool/HyperScreen_Enabler_for_Wii_style_Hyper_List.bat
3. ZFBimagesToolSparda (for HyperScreen) *If it doesn't work properly, try alternative version here.
4. Tool for rebuild game list (frogtool, or frogtool GUI, or Qs_tool(*Included in the custom theme), etc) ----- [Installation instruction]
1. Open "Hyper Screen Generator" (hyper_list_gen.html). ... Windows Edge browser is recommended, Chrome browser will probably work too.
2. Click the button next to "*Game files:". 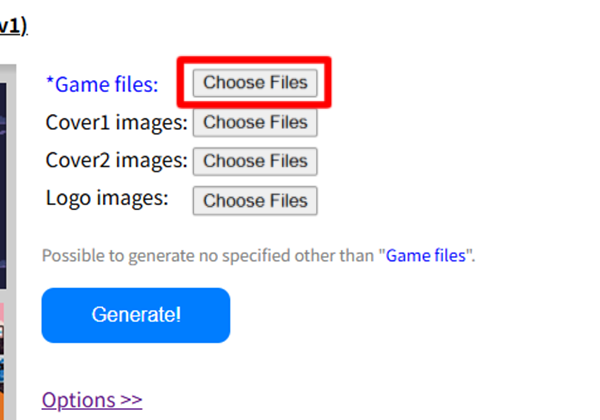
... Find the folder containing the target game files and select all the game files in it, (Press Ctrl+A key) and click the OK button. The number of files will now be displayed on the screen. You will also see a preview of the actual game menu status on the left side of the screen.
3. Press the "Generate!" button, this completes the generation of the HyperScreen. Press OK on the completion message to download the ZIP file. ("merged_images.zip")
4. All that remains is to create a ZFB file using the HyperScreen pngs in the ZIP file.
... Once have extracted all the pngs in the ZIP file, run the "ZFBimagesToolSparda Hyper". Specify the above png folder as the Input folder and specify the core name and file extension (image size is "auto"), and click the "Create ZFB Files" button to complete the zfb file generation. 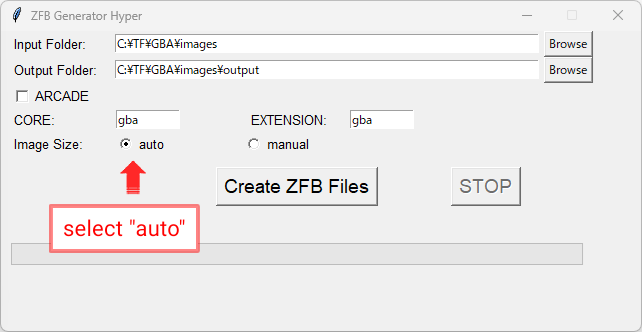
(* Please refer to the screenshot above. For stock core arcade games, turn on the "ARCADE" checkbox on screenshot above.)
5. Copy the resulting zfb file to the target folder on the SD card. (FC/SFC/MD/GBA, etc. folder)
And run tool (frogtool or frogtool GUI or Qs_tool) to rebuild game listings.
At end, run "HyperScreen Enabler" (/Resources/Qs_tool/HyperScreen_Enabler_for_Wii_style_Hyper_List.bat).
*In case for the first time, copy "HyperScreen_Enabler_for_Wii_style_Hyper_List.bat" into the "/Resources/Qs_tool" folder.
this link
... Please modify the following file:"/Resources/Foldername.ini"
Change the second line from the bottom to the following.
---Before change (example) ---
24 102 144 208
---After change ---
0 95 640 385
* Just change the 4 numbers (x x 144 208) to 0 95 640 385.
-----
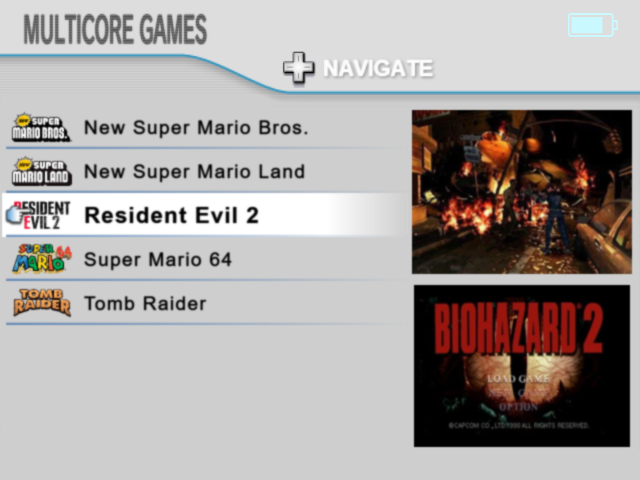
With the above 5 steps, the installation is complete🆗 Start SF2000 and enjoy the new Hyper List Menu!
Once have successfully verified the operation of HyperScreen in the "Basic Introduction", let's add cover images (thumbnails), and logo.👾
-----
[Necessary tools]
・Skraper --> tool to get cover art and game logo (please see Skraper tutorial for how to use)
* Other tools are the same as in "Basic Introduction".
Prepare the cover image No.1 and No.2 png images and the game logo png images using Skraper or other tools.
(Each of the three folders should contain png image files with the same name as the game file name (excluding the file extension)).
-----
[Instruction]
I. If necessary, select all the image/logo files by pressing the respective buttons for cover images 1 and 2, and for logo images in the same way as above. (Open each folder, press Ctrl+A key and press OK.)
Can also check the status of each addition in the preview.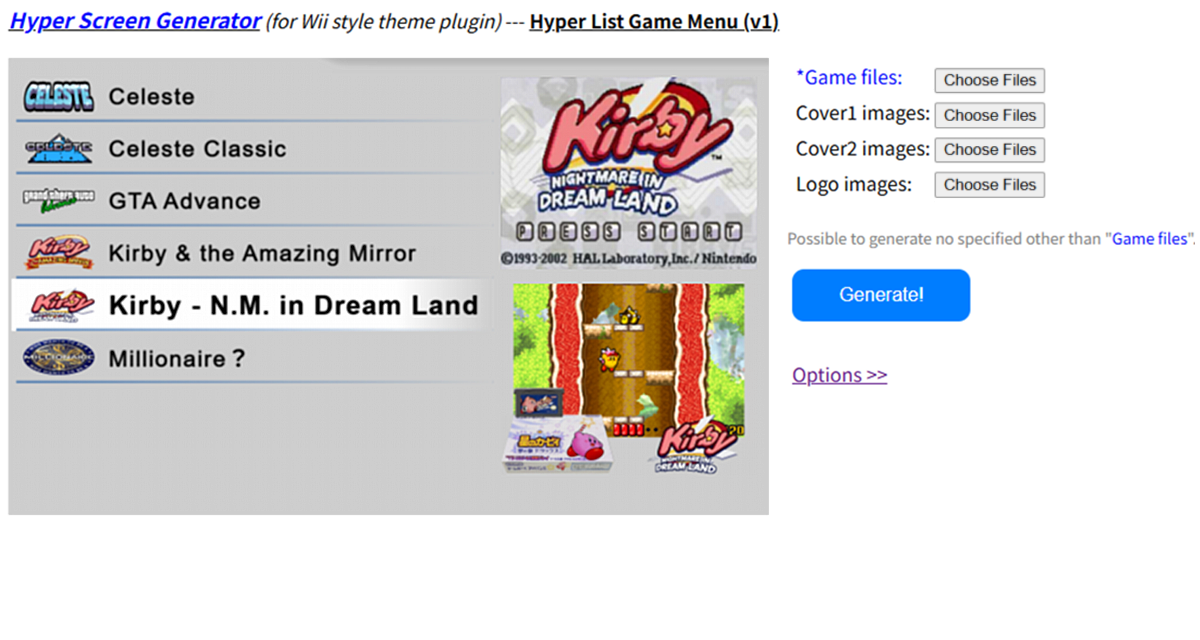
II. The rest of the steps are the same as those described in "Basic Introduction" 3~5.
-----With the above 3 steps, HyperScreen integration is complete.🆗 Start SF2000 and enjoy the new Hyper List Menu!
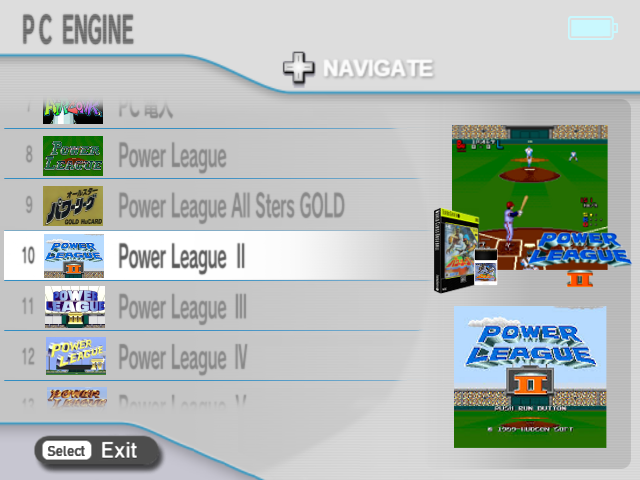
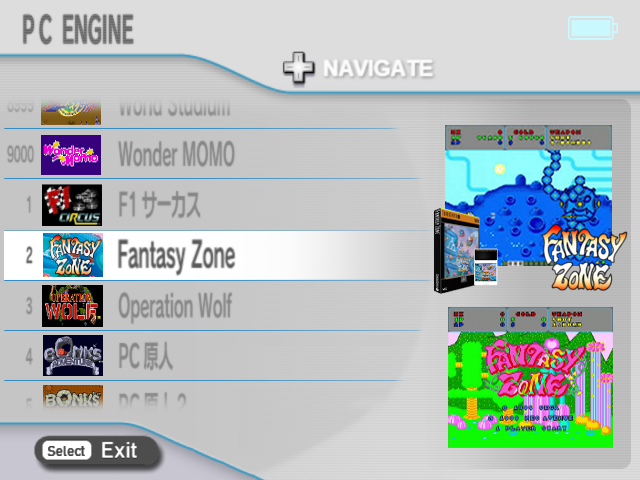
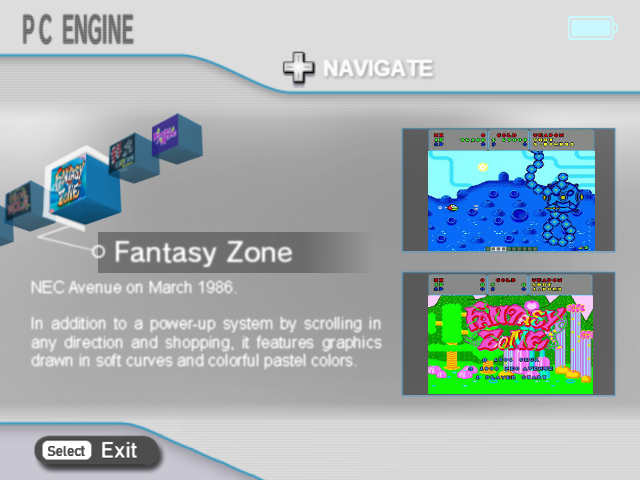
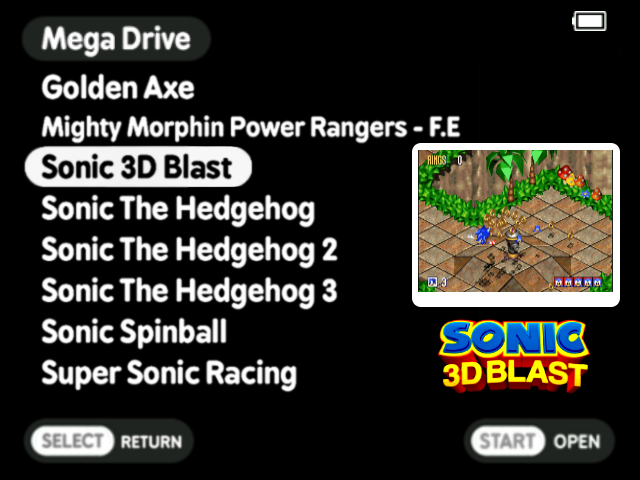
・ (plugin) Wii style theme - Hyper Cube Game Menu
This is a plugin that changes the game selection list menu to a new interface. (* currently a testing release.)
* Installation Guide is explained in "detail ▼"
This HyperScreen is a plugin adjusted for the Wii menu style theme.* HyperScreen is a feature invented by @Sparda_Hunter
-----
[Necessary tools] 1. Hyper Screen Generator (for Hyper Cube) --> hyper_cube_gen.html
2. HyperScreen Enabler --> /Resources/Qs_tool/HyperScreen_Enabler_for_Wii_style_Hyper_Cube.bat
3. ZFBimagesToolSparda (for HyperScreen) *If it doesn't work properly, try alternative version here.
4. Tool for rebuild game list (frogtool, or frogtool GUI, or Qs_tool(*Included in the custom theme), etc) ----- [Installation instruction]
1. Open "Hyper Screen Generator" (hyper_cube_gen.html). ... Windows Edge browser is recommended, Chrome browser will probably work too.
2. Click the button next to "*Game files:". 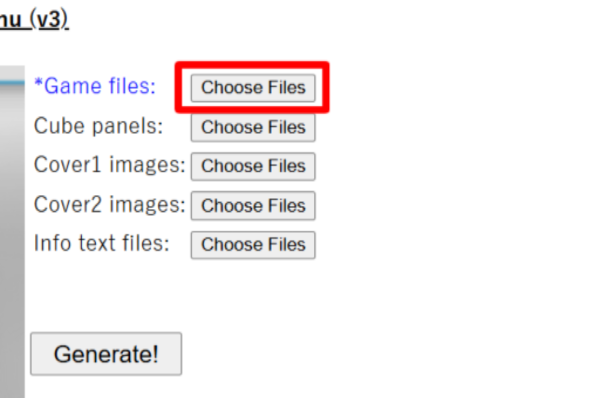
... Find the folder containing the target game files and select all the game files in it, (Press Ctrl+A key) and click the OK button. The number of files will now be displayed on the screen. You will also see a preview of the actual game menu status on the left side of the screen.
3. Press the "Generate!" button, this completes the generation of the HyperScreen. Press OK on the completion message to download the ZIP file. ("merged_images.zip")
4. All that remains is to create a ZFB file using the HyperScreen pngs in the ZIP file.
... Once have extracted all the pngs in the ZIP file, run the "ZFBimagesToolSparda Hyper". Specify the above png folder as the Input folder and specify the core name and file extension (image size is "auto"), and click the "Create ZFB Files" button to complete the zfb file generation.
(* Please refer to the screenshot above. For stock core arcade games, turn on the "ARCADE" checkbox on screenshot above.)
5. Copy the resulting zfb file to the target folder on the SD card. (FC/SFC/MD/GBA, etc. folder)
And run tool (frogtool or frogtool GUI or Qs_tool) to rebuild game listings.
At end, run "HyperScreen Enabler" (/Resources/Qs_tool/HyperScreen_Enabler_for_Wii_style_Hyper_Cube.bat).
*In case for the first time, copy "HyperScreen_Enabler_for_Wii_style_Hyper_Cube.bat" into the "/Resources/Qs_tool" folder.
this link
... Please modify the following file:"/Resources/Foldername.ini"
Change the second line from the bottom to the following.
---Before change (example) ---
24 102 144 208
---After change ---
0 80 640 400
* Just change the 4 numbers (x x 144 208) to 0 80 640 400.
-----
With the above 5 steps, the installation is complete🆗 Start SF2000 and enjoy the new Hyper Cube Menu!
Once have successfully verified the operation of HyperScreen in the "Basic Introduction", let's add cover images (thumbnails), cube panel, and information text.👾
-----
[Necessary tools]
・Skraper --> tool to get cover art and game logo (please see Skraper tutorial for how to use)
・cube_panel_converter.py --> tool to transform game logo images to fit into a cube shape (batch generation of cube panel pngs)
* If would like to use Windows exe instead of py, can download it from the URL below.
https://github.com/Q-ta-s/SF2000-Custom-Themes/raw/main/%23plugins/Hyper%20Cube%20Game%20Menu/cube_panel_converter_v0.1.exe
* Other tools are the same as in "Basic Introduction".
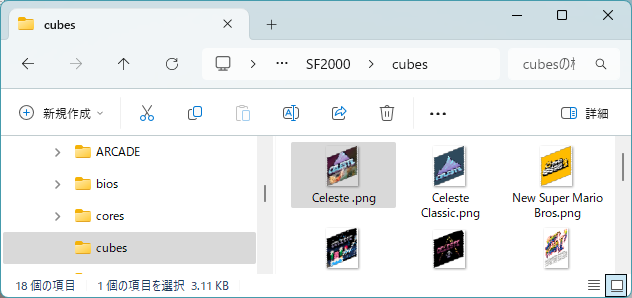
Prepare the cover image No.1 and No.2 png images and the game logo png images for the cube panel using Skraper or other tools.
(Each of the three folders should contain png image files with the same name as the game file name (excluding the file extension)).
Also, if necessary, store info text files (*.txt) with the same name in the fourth folder as well. In the info text file, fill in the game maker name, release date, and game features using a text editor and save it.
-----
[Instruction]
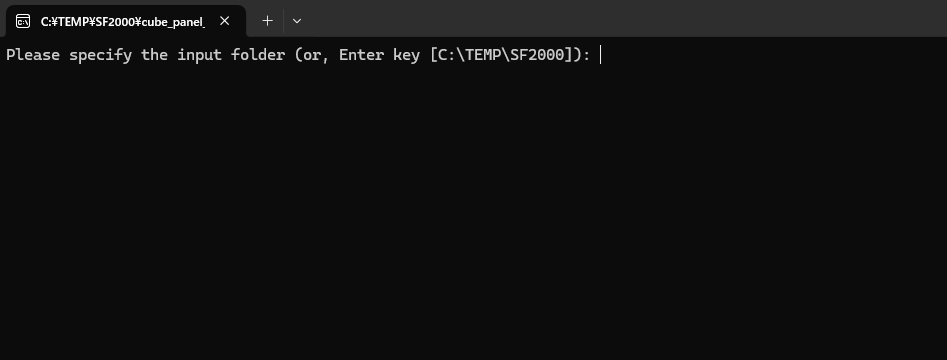
I. First the steps are same 1~2 of the "Basic Introduction", but to add cube panel (game logos), use the cube_panel_converter.py tool (or cube_panel_converter_v0.1.exe) to specify the folder where the game logo png image is stored, and convert it to a cube panel (bulk transformed png images that fits into the cube).
II. If necessary, select all the image/text files by pressing the respective buttons for cover images 1 and 2, and for the info text in the same way as above. (Open each folder, press Ctrl+A key and press OK.)
Can also check the status of each addition in the preview.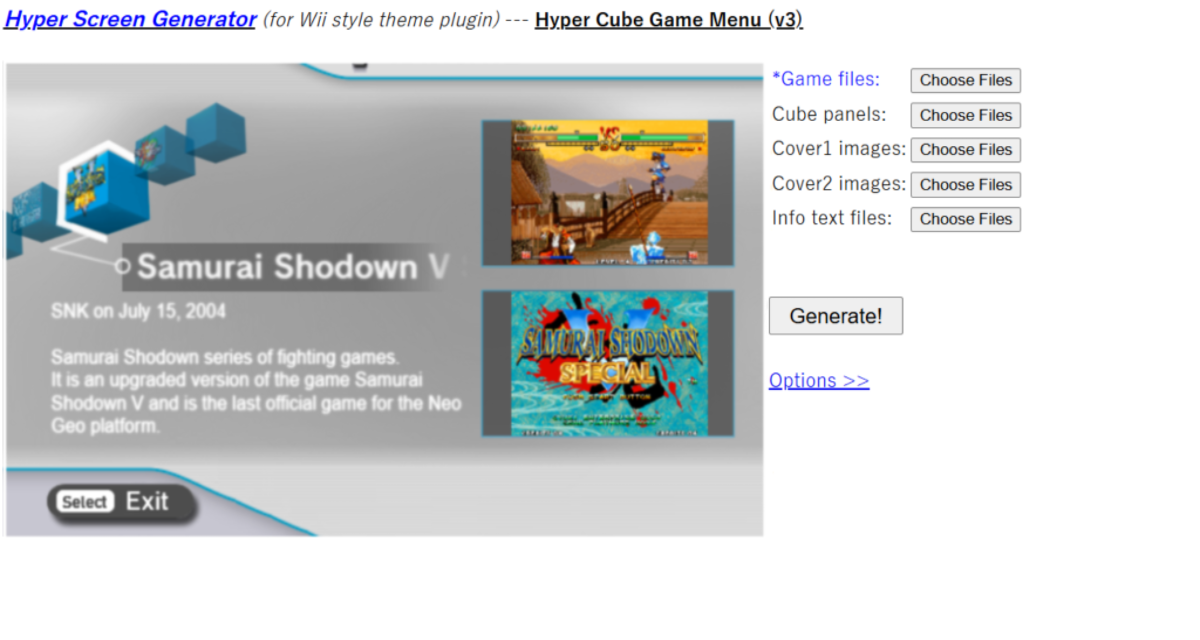
III. The rest of the steps are the same as those described in "Basic Introduction" 3~5.
-----With the above 3 steps, HyperScreen integration is complete.🆗 Start SF2000 and enjoy the new Hyper Cube Menu!
[Installation Guide (Discord)]:
| (Basical) | https://discord.com/channels/741895796315914271/1345670270819766313/1347588323790557285 |
| (Advanced) | https://discord.com/channels/741895796315914271/1345670270819766313/1347592021614788660 |
・(icon) Wii style theme - Icon Pack
If use this icon to paste into Resources, able to customize to liking favorite game system in SF2000. * If change it, useful each game systems resource info below.-In /Resources folder: 1st game system category Main Menu: fixas.ctp Game List: urlkp.bvs 2nd game system category Main Menu: drivr.ers Game List: c1eac.pal 3rd game system category Main Menu: icuin.cpl Game List: ihdsf.bke 4th game system category Main Menu: xajkg.hsp Game List: fltmc.sta 5th game system category Main Menu: qwave.bke Game List: cero.phl 6th game system category Main Menu: irftp.ctp Game List: efsui.stc 7th game system category Main Menu: hctml.ers Game List: apisa.dlk 8th game system category Main Menu: dsuei.cpl Game List: qasf.bel

-
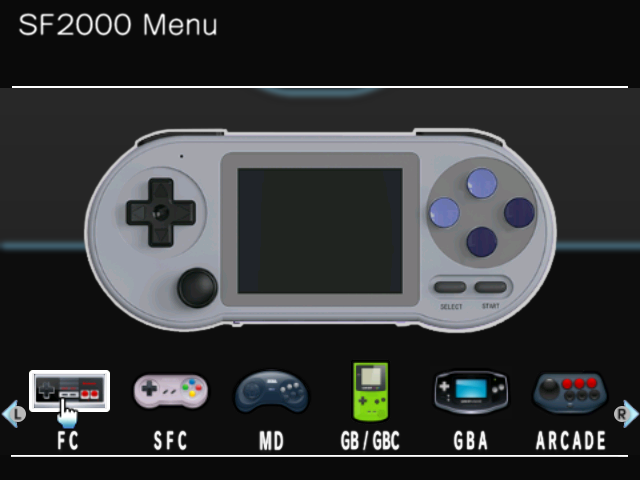
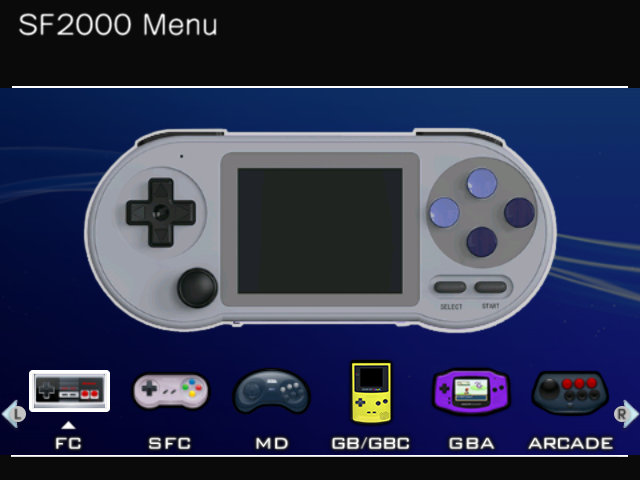
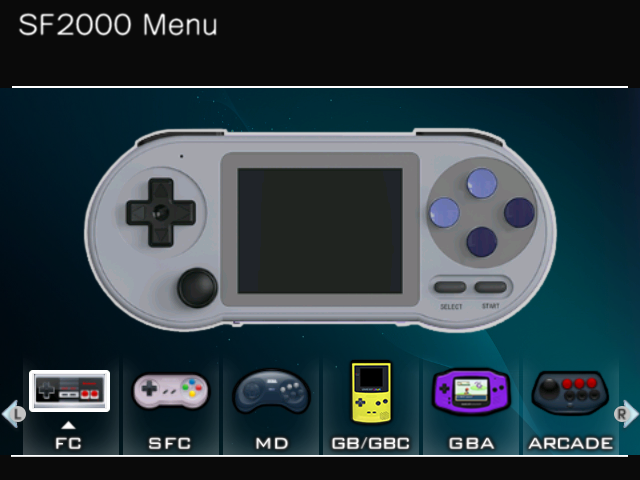
11. SF3000 UI
This custom theme for guys who don't plan on buying, but just want to feel the mood for SF3000.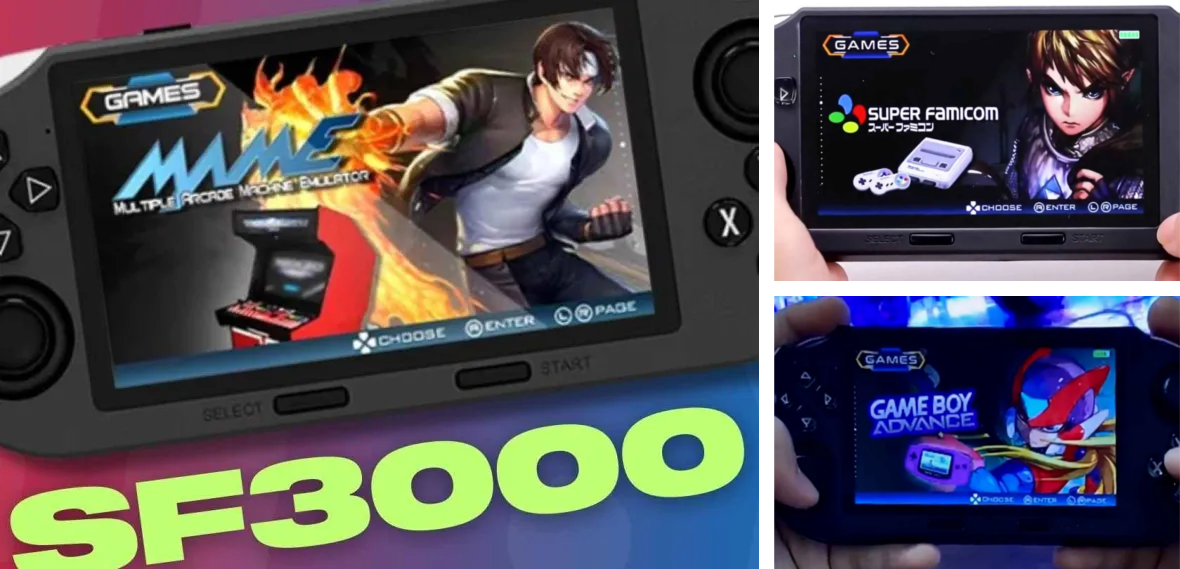 * Thanks to @osaka and @moto, were able to make all game menus. Thank you🐸
https://discord.com/channels/741895796315914271/1345705787514687538/1346651037460594740
https://discord.com/channels/741895796315914271/1346239799924883567/1346827785884139640
If have already purchased SF3000 and have any comments or information about the UI (such as differences in this UI theme), please feel free to contact @Q_ta and tell 👾
(Will try to make corrections as much as possible to make it as close to the real thing)
* Thanks to @osaka and @moto, were able to make all game menus. Thank you🐸
https://discord.com/channels/741895796315914271/1345705787514687538/1346651037460594740
https://discord.com/channels/741895796315914271/1346239799924883567/1346827785884139640
If have already purchased SF3000 and have any comments or information about the UI (such as differences in this UI theme), please feel free to contact @Q_ta and tell 👾
(Will try to make corrections as much as possible to make it as close to the real thing)
-
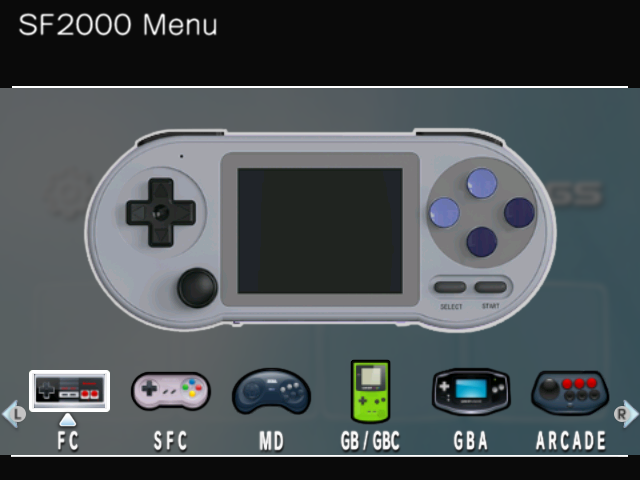
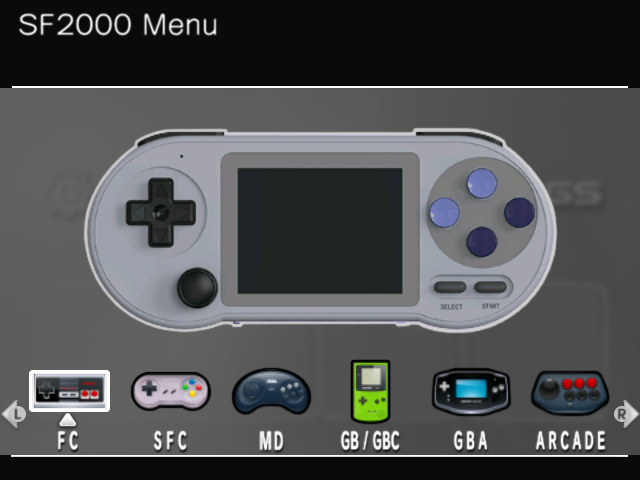
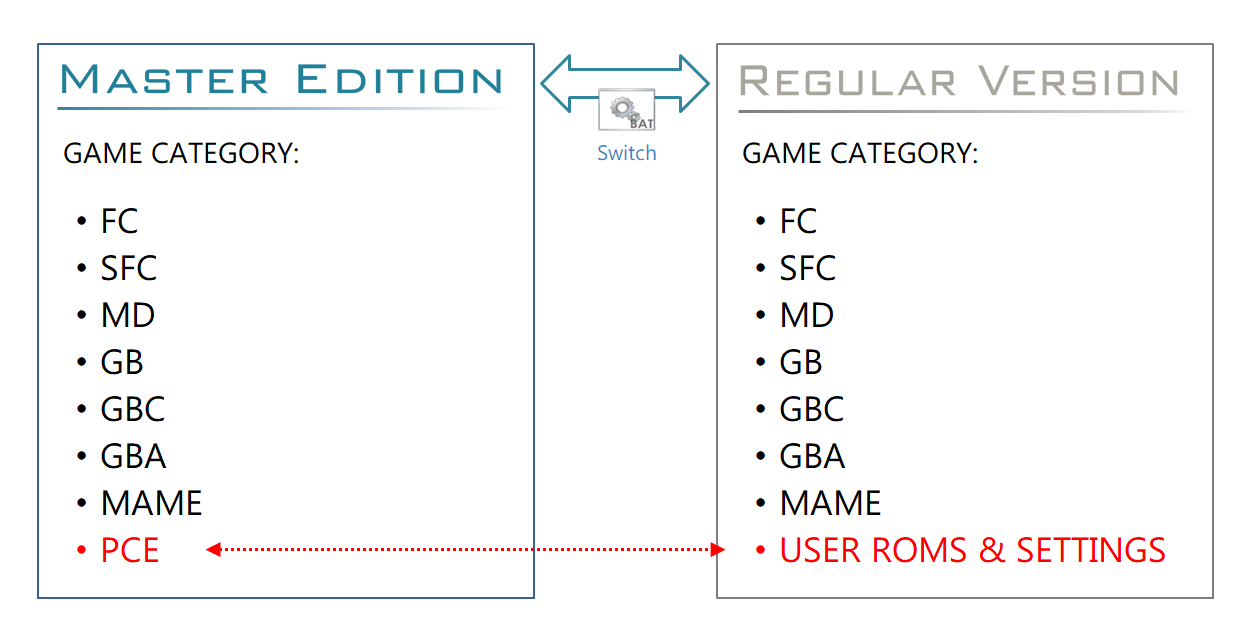
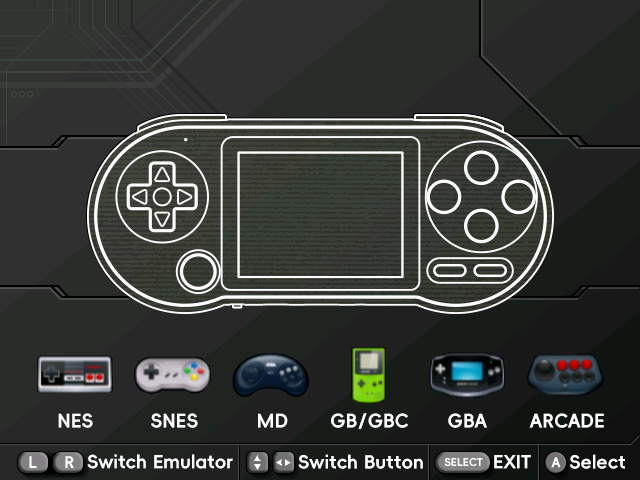
12. SF3000 UI - Master Edition
If you're looking to get a more similar look to the SF3000... Shared a custom theme that remakes the look with attention to detail✨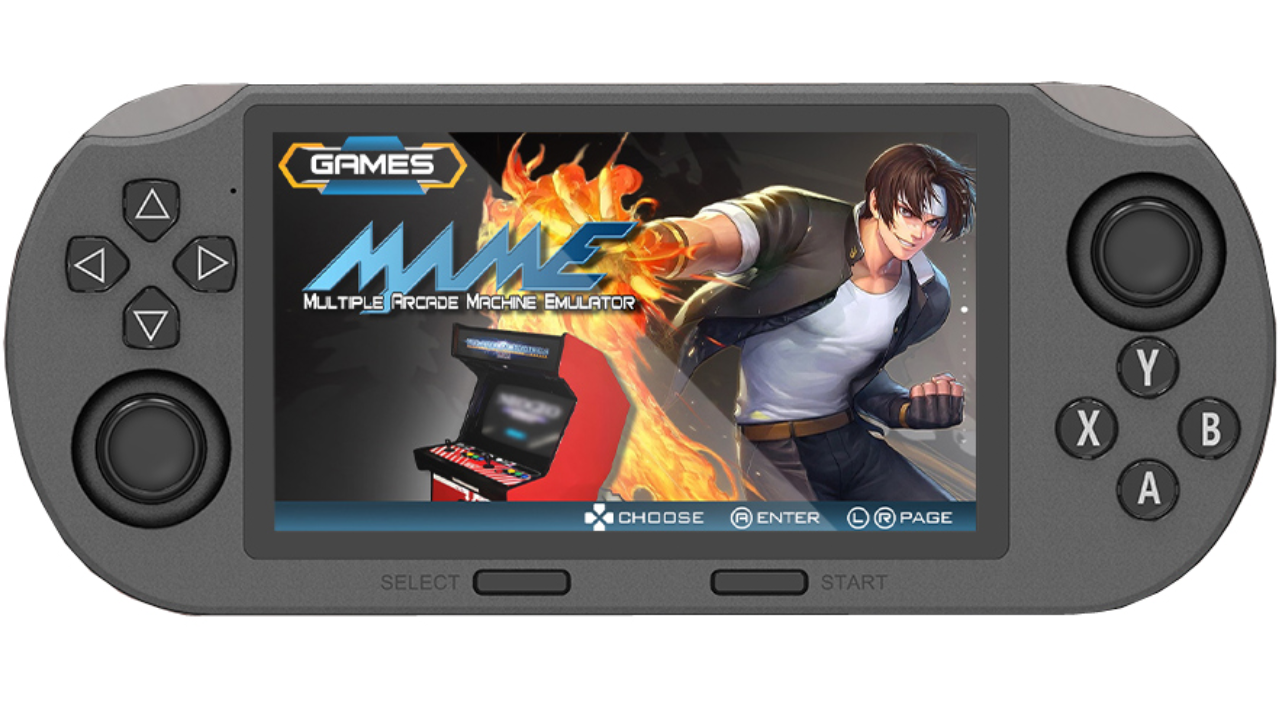 Different Regular version, by deliberately removing the four game shortcut icons, I think the look is closer to the SF3000 at first glance.
 ・Removed 4 shortcut icons.
(* About this, listening to some people opinions)
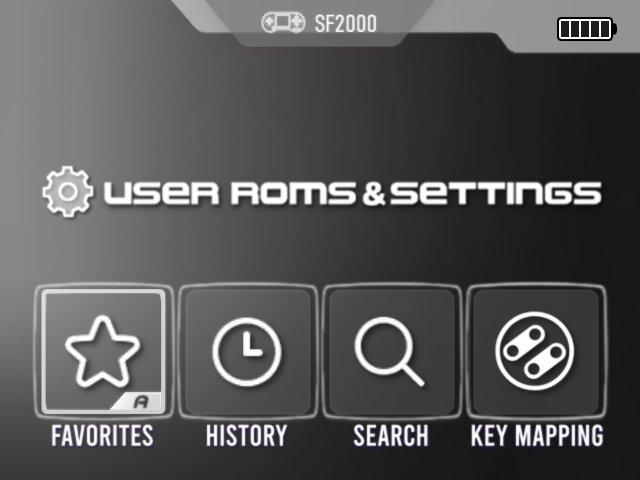
・User ROMS & Settings has been hidden.
(* added PC Engine category instead)
・Others, also made changes to other parts of the design, like the color scheme, the game list, the pause menu, and so on.
Although there are some points to keep in mind as mentioned above, this is an edition for those who still want to be particular.👾
* The above says "User ROMS & Settings has been hidden", but don't worry. In the Master Edition, can easily turn on/off the display of User Settings.
(Just run batch file. For details, please refer to the Readme.txt included with the custom theme.)
・Removed 4 shortcut icons.
(* About this, listening to some people opinions)
・User ROMS & Settings has been hidden.
(* added PC Engine category instead)
・Others, also made changes to other parts of the design, like the color scheme, the game list, the pause menu, and so on.
Although there are some points to keep in mind as mentioned above, this is an edition for those who still want to be particular.👾
* The above says "User ROMS & Settings has been hidden", but don't worry. In the Master Edition, can easily turn on/off the display of User Settings.
(Just run batch file. For details, please refer to the Readme.txt included with the custom theme.)
 * If use the settings, favorites, search, and others frequently and find it troublesome to switch between user settings (if don't care about the UI details of the SF3000), please use the Regular version mode.🐸
* With @osaka's help, able to made this custom theme with close attention to detail.
Very grateful, Thank you.
* If use the settings, favorites, search, and others frequently and find it troublesome to switch between user settings (if don't care about the UI details of the SF3000), please use the Regular version mode.🐸
* With @osaka's help, able to made this custom theme with close attention to detail.
Very grateful, Thank you.

-
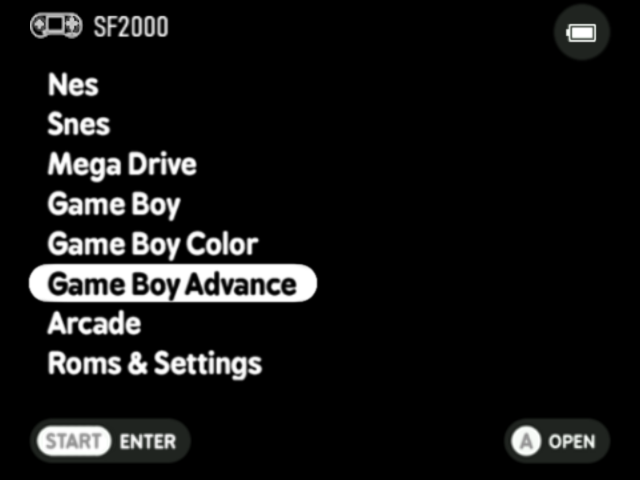
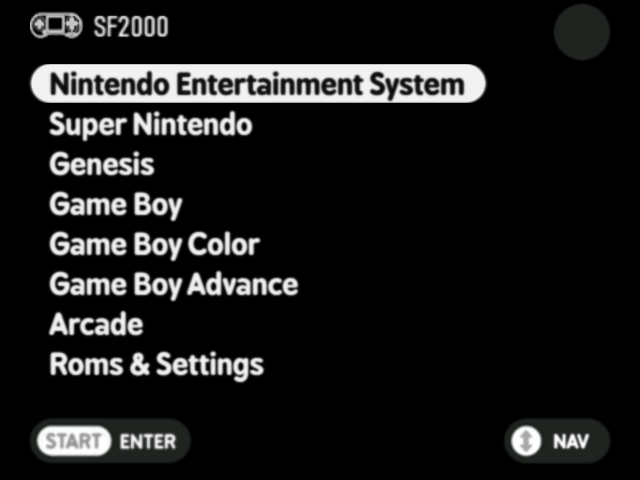
13. MinUI
A custom theme that inspired by MinUI style. *This is an unofficial theme that is not directly related to the original MinUI, as it is a theme. In the unlikely event that a problem occurs, please note that the original author of the official MinUI will not be held responsible for any consequences that may occur. Original MinUI: https://github.com/shauninman/MinUI * A tool (batch file) is included that allows to switch the game list indicator according to preference. - This is a plugin that changes the game selection list menu to a MinUI-style interface.
Please refer to the link below for instructions on how to use it.
https://discord.com/channels/741895796315914271/1345670270819766313/1385807751409696899
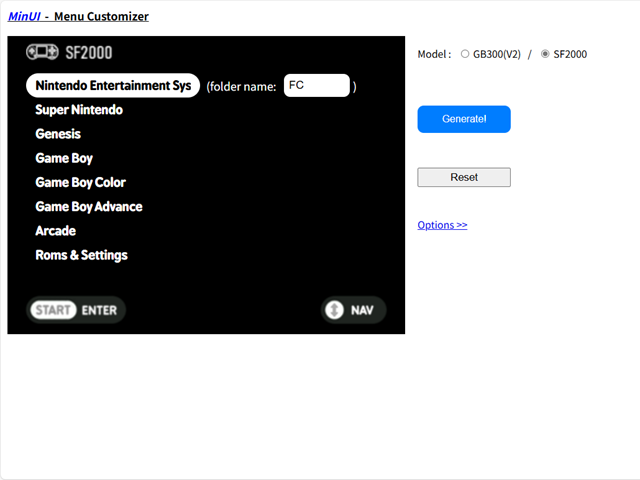
・ (plugin) MinUI - Menu Customizer
This is a plugin that allows to freely change the MinUI game menu.
Let's create your own game menu!
It's very easy to make, just modify the menu as shown in the video below and press a button.
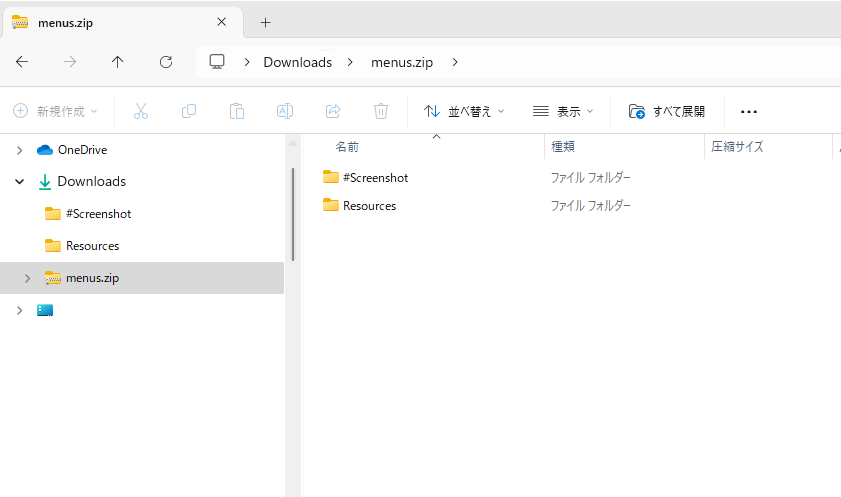
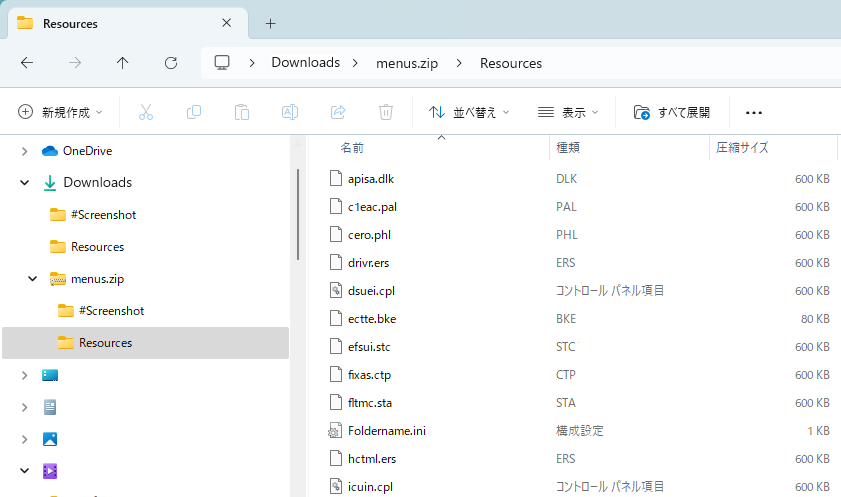
All have to do is overwrite the "Resources" folder in it to your SD card and done!🐸 The web browser has been confirmed to work with Edge or Google Chrome. (It may not work properly with other browsers) *Can also change the names of each folder, but after copying them to the "Resources" folder, recommend that rebuild the SD card using the Qs_tool batch file. (*The batch file is included in the custom theme)
-
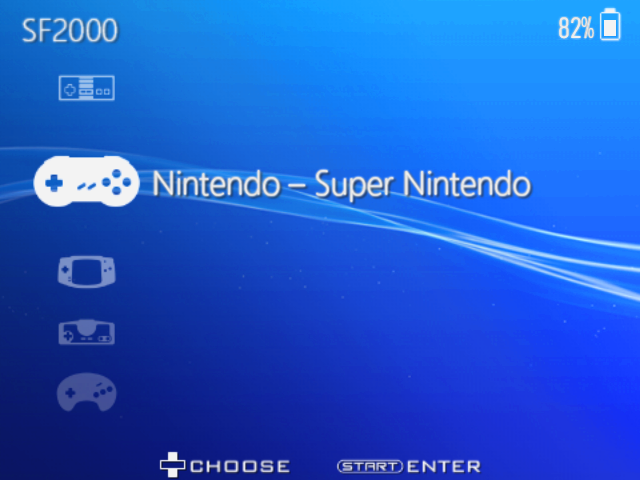
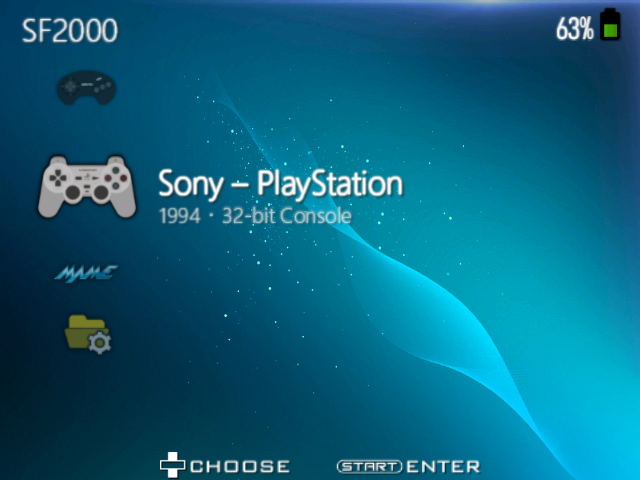
14. RetroXMB
A custom theme that inspired by well known the familiar XMB style. This theme is customized (for mulitcore) game system order and categories, so may not be able to use it properly (e.g. game not starting) unless read Readme.txt.
Game System Menu: FC, SFC, GB/GBC/GBA, PCE, MD/GG/SMS, ARCADE, MULTICORE GAMES, USER R&S
* A tool (batch file) is included that allows to switch the selection cursor according to preference. -
15. RetroXMB Alternative (Old Fashion)
Another version of the XMB style above. (according to preference) This theme is customized (for mulitcore) game system order and categories, so may not be able to use it properly (e.g. game not starting) unless read Readme.txt.
Game System Menu: FC, SFC, GB/GBC/GBA, PCE, MD/GG/SMS, ARCADE, MULTICORE GAMES, USER R&S
* A tool (batch file) is included that allows to switch the selection cursor according to preference.
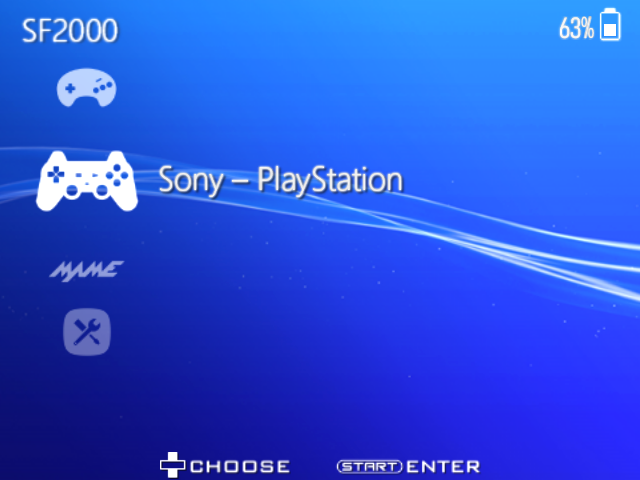
・ RetroXMB - PS1 Edition
A custom theme for the PS1 game menu.
This is a custom theme with "PS1" menus that are not included in the regular version. (Standard / Old Fashion)
・Game system menu:
1. NES
2. SNES
3. GB/GBC/GBA
4. PCE
5. MD/GG/SMS
6. PS1
7. ARCADE (MAME/FB)
8. USER ROMS & SETTINGS
-
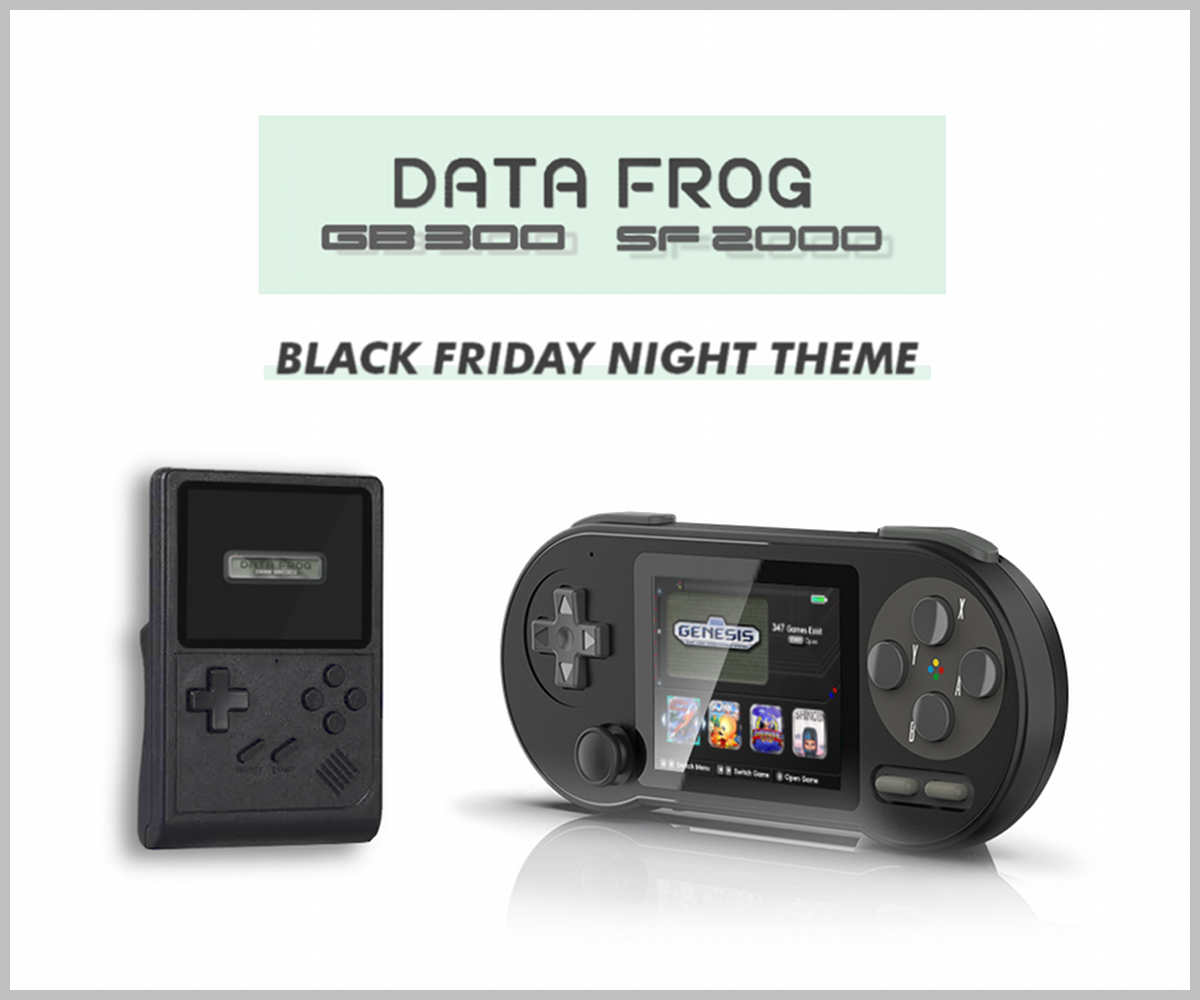
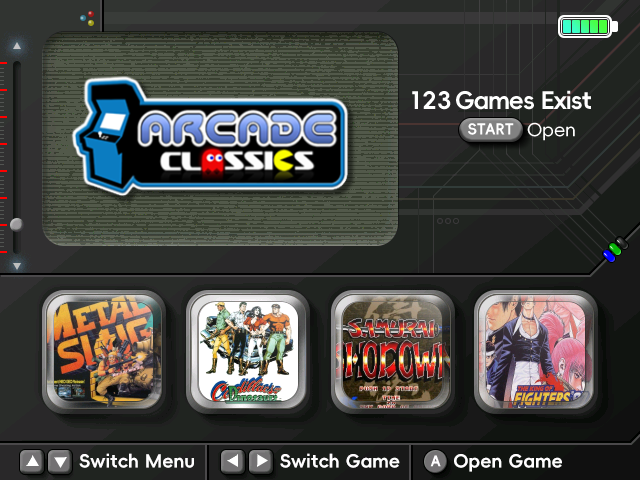
16. BLACK FRIDAY NIGHT Theme
This custom theme is a modification of the new theme recently released with the SF2000 Black color console. Thank you @osaka for sharing the resources!👾 https://www.reddit.com/r/DataFrog/comments/1h4kpqg/did_anyone_buy_an_sf2000_with_the_new_theme
This is an officially released theme from Datafrog, but there were some issues with the red meter display on the left side of the NES main menu being cut off, and also remaining cut off even when switching to a different category, so have fixed these🐸
Also fixed the issue where the battery meter display had slightly distorted on the SF2000.
It includes encapsulation overlays (png) for the four shortcut icons, which may be useful for those who want to customize their shortcuts.
* It also includes the official boot logo and a modified resource with the game title centered.
https://www.reddit.com/r/DataFrog/comments/1h4kpqg/did_anyone_buy_an_sf2000_with_the_new_theme
This is an officially released theme from Datafrog, but there were some issues with the red meter display on the left side of the NES main menu being cut off, and also remaining cut off even when switching to a different category, so have fixed these🐸
Also fixed the issue where the battery meter display had slightly distorted on the SF2000.
It includes encapsulation overlays (png) for the four shortcut icons, which may be useful for those who want to customize their shortcuts.
* It also includes the official boot logo and a modified resource with the game title centered.
« Back